

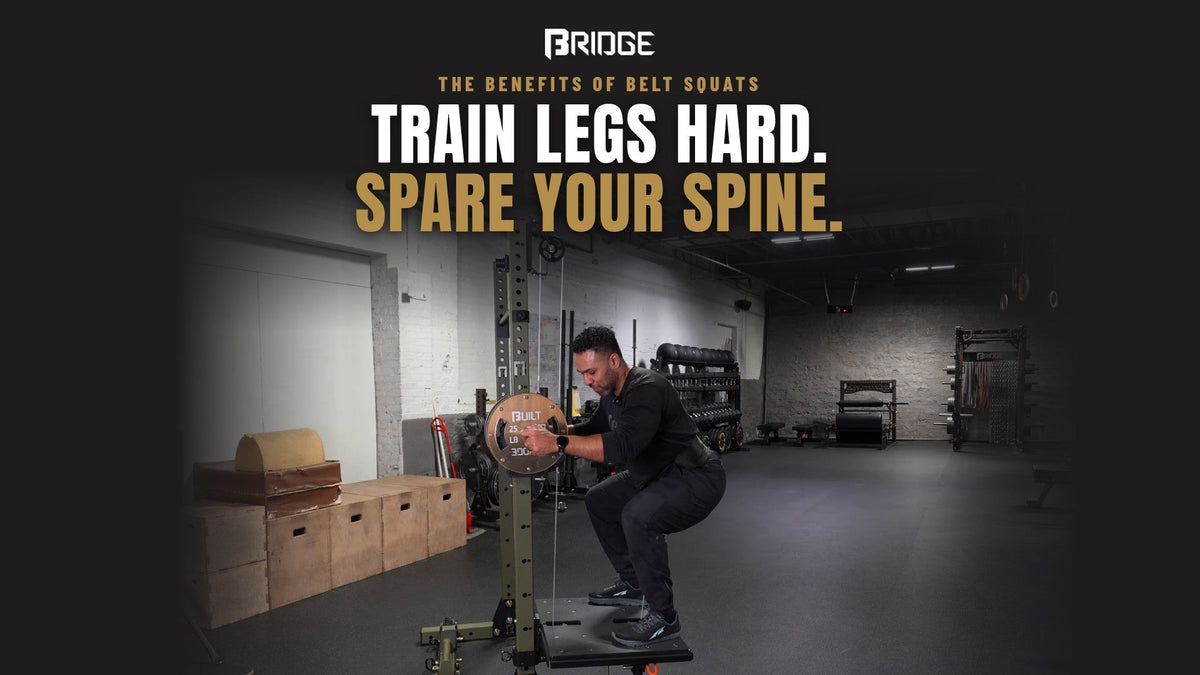
 Deep, upright, and nothing on your spine: a belt squat on the Omni Belt Squat System.
The barbell back squat is a great lift, and nothing here is meant to replace it. But many lifters hit the same wall: their legs could keep going, but their lower back is done. Or a sore back means another skipped leg day. The belt squat solves both problems, and it's one of the most underrated tools in strength training.
Whether you've never tried one or you already belt squat every week, here's what it does, why it works, and how to get more out of it.
What Is a Belt Squat?
A belt squat loads the weight at your hips instead of on your shoulders. You wear a padded belt around your waist (just below the belt line, across the top of the hips), the belt connects to the load, and you squat.
 The belt sits across the top of the hips, so the load goes to your legs, not your back.
Instead of resting on your upper back and traveling down through your spine, the weight goes straight to your hips and legs. Your arms are free, there's no bar to balance, and your torso doesn't have to support the load.
That one change makes a big difference in how the lift feels and in what it trains.
The Core Benefits
1. Less load on your spine
In a back squat, your spine and trunk have to hold every pound on the bar for every rep. That bracing is valuable training, but it's also usually what gives out first: your lower back tires before your legs are done.
A belt squat takes the spine out of the load path. Your quads, glutes, and adductors do the work, and your back gets a break. That's useful for anyone managing back fatigue, coming off a heavy deadlift day, or simply wanting more leg volume than their back can handle.
2. More leg training per session
Because your back isn't the limiting factor, you can do more hard leg sets in a session. It's a simple way to add training volume, which is a key driver of muscle growth, without adding much fatigue to your lower back.
3. Low-risk sets close to failure
There's no bar on your back to get stuck under. If a rep stalls, you stand up out of it or set the weight down. That makes the belt squat a great place to push sets close to failure, run high-rep burnouts, and grind out the last few reps, which are hard to do safely with a barbell when you're training alone.
4. Easier on a cranky back
If your back doesn't tolerate heavy spinal loading right now, belt squats let you keep training your legs hard while it recovers. (If you're coming back from an injury, work with your doctor or physical therapist on what's appropriate.)
5. A small footprint
Traditional belt squat machines are big and take up a lot of floor space. Rack-mounted belt squat systems put the movement on equipment you already own, which matters in a garage or home gym.
Why Cable-Based Beats Lever-Arm Belt Squats
There are two main styles of belt squat: lever-arm and cable-based.
Lever-arm belt squats are usually the cheaper option, and that's a fair reason they're popular. But a lever arm swings in an arc around a pivot point, so the load follows that arc instead of moving straight up and down. That means:
- It's not a true squat pattern. The arc pulls you forward or back through the rep instead of letting you sit straight down between your hips.
- More pressure on the lower back at the bottom. At the deepest part of the rep, where you're most vulnerable, the arc's angle can put more pressure on your lumbar spine. That's exactly what most people buy a belt squat to avoid.
A cable-based system like the Omni Belt Squat System pulls straight down from your hips, so the load stays in line with your body through the whole rep. You get a true squat pattern with the least shear force on your spine. If spinal health is why you're belt squatting, the type of system matters.
 A lever arm moves the load in an arc; a cable pulls straight down.
Technique: Dialing In the Basics
 Start shoulder-width, toes slightly out, and sit straight down between your hips.
- Belt position: Across the top of your hips. Too high and it rides up toward your waist and pulls you forward. Too low and it slips.
- Stance: Start about shoulder-width, toes turned slightly out, weight balanced over mid-foot.
- The descent: Sit straight down between your hips. With no bar on your back, you can stay much more upright than in a back squat.
- Depth: Go as deep as you can while keeping your heels down and your pelvis neutral. Belt squats let most people sit deeper than they can with a bar.
- The drive: Push the floor away and stand tall. Control the bottom. Don't bounce out of it.
- Hands: Lightly hold the rack or a handle for balance if you want, but don't use them to pull yourself up.
For Experienced Belt Squatters: Getting More Out of It
Why an upright torso hits your quads harder
In a back squat, your torso leans forward to keep the bar over mid-foot, which brings your hips and glutes more into the lift. The belt squat removes the bar, so your torso can stay nearly vertical while your knees travel forward over your toes. More knee bend relative to hip bend shifts the work toward your quads. If quad growth is the goal, that upright position is a big advantage.
Stance variations and what they emphasize
- Narrow stance (feet hip-width or slightly closer): The most knee-dominant setup and the strongest quad bias. Expect your knees to travel well forward.
- Shoulder-width: The balanced middle ground for quads, glutes, and adductors. A good default.
- Wide stance, toes out: More adductor and glute involvement, with a shorter, more hip-driven range of motion.
- Elevated heels (on small plates or a wedge): Lets your knees travel even further forward, adding more quad emphasis. This is great if your ankle mobility limits your depth.
- Deficit (feet on boxes): Standing on sturdy boxes adds range of motion so you can sink deeper than the floor allows.
- Split stance: Single-leg work that exposes and fixes side-to-side differences, without dumbbells taxing your grip.
 Deficit stance: feet on boxes for extra range of motion and depth.
Use tempo and pauses
The belt squat is ideal for tempo work because you can focus on your legs without worrying about the bar. - Slow eccentrics: Take 3–4 seconds on the way down to build more tension at lighter loads. - Pause squats: Hold 2–3 seconds in the bottom. This removes the bounce and builds strength where most people are weakest. - 1¼ reps: Sink to the bottom, rise a quarter of the way, sink again, then stand. Your quads will feel it.
Belt squat marches
Stand tall with the belt loaded and your knees slightly bent, and march in place, driving each knee up while the hips stay level. Marches train the hip flexors and glutes under load, challenge your core and single-leg stability, and are a great conditioning finisher. Try timed rounds, such as 30–60 seconds on and 60 seconds off.
Other movements
Home gym creator Cooper Mitchell put it well in a recent post:
"The belt squat is one of the most versatile pieces of home gym equipment in existence. I've configured mine to do everything from weighted pull-ups and dips to hip thrusts... The best equipment combines a lot of exercises, in a small footprint, with minimal time."
Depending on your setup, the belt can also load hip thrusts, split squats, step-ups, and hip-hinge variations. These are hip-loaded versions of familiar exercises that don't depend on your grip or balancing a barbell.
Programming Belt Squats
After barbell work
Do your heavy barbell squats first while you're fresh, then use the belt squat for volume: 3–4 sets of 10–15 reps at a weight that leaves 1–2 reps in the tank. Your legs keep working after your back is done.
As your main squat
On days when your back needs a rest, make the belt squat your main lift. Work up to heavier sets of 6–10 reps, then add a paused or tempo set.
Recovery days
Light belt squats and marches are a good way to move and get blood flowing without spinal loading. Keep the effort easy, around half your usual working weight, and stop well short of fatigue.
Progressing load and reps
Use double progression: pick a rep range (for example, 8–12). Once you hit the top of the range on every set with good form, add a small amount of weight and work back up. If load jumps are too big, progress with tempo, pauses, or an extra set first.
Sample week
- Day 1: Barbell back squat, then belt squat 3×12
- Day 2: Belt squat main lift, working up to a heavy 3×8, plus a paused set of 6
- Day 3 (optional): Belt squat marches, 4 × 45 seconds, plus split-stance belt squats 2×10 per leg
Getting Set Up
The Omni Belt Squat System does not require pulleys on your rack. It comes with everything you need to belt squat. You just supply a 3x3" or 2x3" rack or rig.
 The complete Omni Belt Squat System mounted on a rack.
If you already have a pulley system on your rack, you can add the Extended Pulley Attachment and the Quick Release Platform to get a solid platform for belt squats. The platform uses fold-away stabilizer feet for a secure base and comes off easily when you're done.
 The Quick Release Platform mounts to your rack and comes off when you're done.
The Omni Belt Squat System is also the Omni-Pulley System 2.0, so the same rack-mounted cable setup covers more than belt squats. Move the cable to the upper pulley and you can do lat pulldowns, triceps pushdowns, biceps curls, rows, and other cable work. That makes it a full pulley station that takes up no extra floor space.
Watch the Omni Belt Squat System in action:
The Bottom Line
The belt squat lets you train your legs hard without loading your spine, add volume after barbell work, take sets closer to failure with little risk, and fit all of it into a small space. Learn the basics, then use stance, tempo, pauses, and marches to keep it challenging. And with a cable-based system, the same setup handles the rest of your cable work too.
If you're ready to add one to your rack, take a look at the Omni Belt Squat System.


Leave a comment
This site is protected by hCaptcha and the hCaptcha Privacy Policy and Terms of Service apply.